iOS-UIBezierPath绘制的简单使用

概述

在iOS中,我们如果想要绘制一些矢量路径,有两种方法供我们选择UIBezierPathCore Graphics,其中UIBezierPath是属于UIKit框架的,也是对Core Graphics的一种封装,所以相对使用起来比较简单,只需要调用系统给好的接口就可以实现很强大的功能。但毕竟是基于Core Graphics封装的,所以如果需要实现更复杂的功能还是Core Graphics比较好用。

刚才已经说过了,使用UIBezierPath非常简单,使用它只需要这样:

  • 1.重写UIView的drawRect方法。
  • 2.创建UIBezierPath并且设置一些常用属性。
  • 3.设置UIBezierPath的颜色。
  • 4.渲染完成绘制。

好了,接下来我们就绘制一些常用的形状来看看吧。

使用

直线

画一条直线我们可以直接创建一个UIBezierPath,然后使用

1
- (void)moveToPoint:(CGPoint)point;

方法将画笔移动至我们想要绘制的起点位置,然后使用

1
- (void)addLineToPoint:(CGPoint)point;

方法传入我们想要绘制这条直线的终点位置,最后设置其他属性和颜色后渲染就可以了。
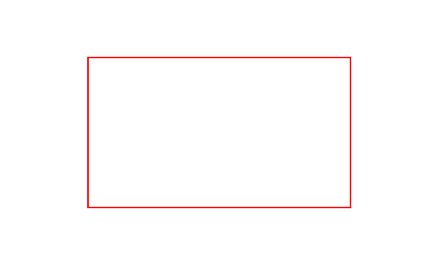
1
2
3
4
5
6
7
8
9
10
UIBezierPath *aPath = [[UIBezierPath alloc] init];
aPath.lineWidth = 10.0; //设置线宽
aPath.lineCapStyle = kCGLineCapRound; //设置端点样式为圆角
[aPath moveToPoint:CGPointMake(100, 200)];
[aPath addLineToPoint:CGPointMake(WIDTH-100, 200)];
UIColor *color = [UIColor redColor];
[color set];
[aPath stroke];
logo

矩形(正方形)

矩形一类的图形我们可以直接使用系统提供的类方法,直接赋予其frame就可以了。
- (void)stroke;方法用于绘制边框,如果想要将颜色填充满整个绘制区域使用- (void)fill;就可以了。

另外,如果想绘制正方形,只需要设置frame时将长和宽设置相等就可以了。
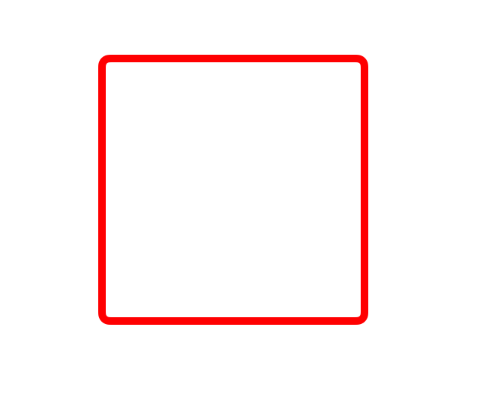
1
2
3
4
5
6
7
8
UIBezierPath *aPath = [UIBezierPath bezierPathWithRect:CGRectMake(100, 200, WIDTH-200, 100)];
aPath.lineWidth = 1.0;
UIColor *color = [UIColor redColor];
[color set];
[aPath stroke]; //绘制线框
// [aPath fill]; //填充满路径
logo

圆角矩形(圆角正方形)

圆角矩形也可以直接使用系统提供的类方法,与矩形不同的是需要多传入一个圆角的参数而已。
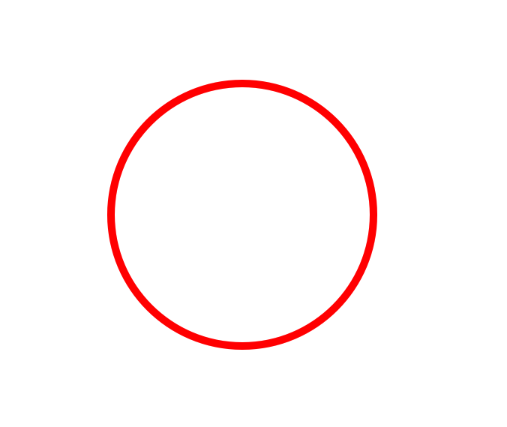
1
2
3
4
5
6
7
UIBezierPath *aPath = [UIBezierPath bezierPathWithRoundedRect:CGRectMake(100, 200, WIDTH-200, WIDTH-200) cornerRadius:5];
aPath.lineWidth = 5.0;
UIColor *color = [UIColor redColor];
[color set];
[aPath stroke];
logo

椭圆形(圆形)

椭圆形也是一样,只要直接使用系统提供的类方法就可以了。同理,如果想绘制圆形,只需要设置frame的长和宽相等就可以了。
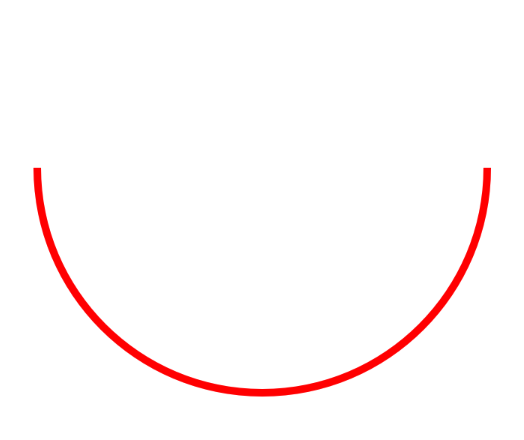
1
2
3
4
5
6
7
UIBezierPath *aPath = [UIBezierPath bezierPathWithOvalInRect:CGRectMake(100, 200, WIDTH-200, WIDTH-200)];
aPath.lineWidth = 5.0;
UIColor *color = [UIColor redColor];
[color set];
[aPath stroke];
logo

弧线。。。也可以使用系统提供的类方法,需要传入的参数多了radius半径、startAngle开始角度、endAngle结束角度、clockwise是否顺时针。

1
2
3
4
5
6
7
8
9
10
11
UIBezierPath *aPath = [UIBezierPath bezierPathWithArcCenter:CGPointMake(WIDTH/2, HEIGHT/2)
radius:150
startAngle:0
endAngle:M_PI
clockwise:YES];
aPath.lineWidth = 5.0;
UIColor *color = [UIColor redColor];
[color set];
[aPath stroke];
logo

贝塞尔曲线

贝塞尔曲线在很多情况下都会使用到,常用的都是Control Point有一个点或者两个点的。
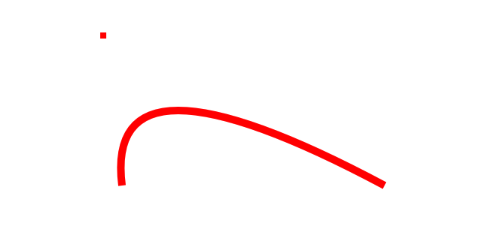
单点控制

logo

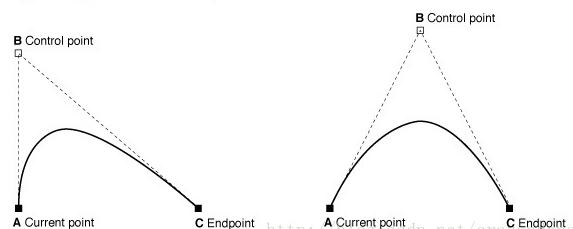
绘制贝塞尔曲线和前边的绘制直线基本相同,先画笔移动到我们的起点位置,然后使用贝塞尔曲线特有的方法进行绘制,传入控制点。
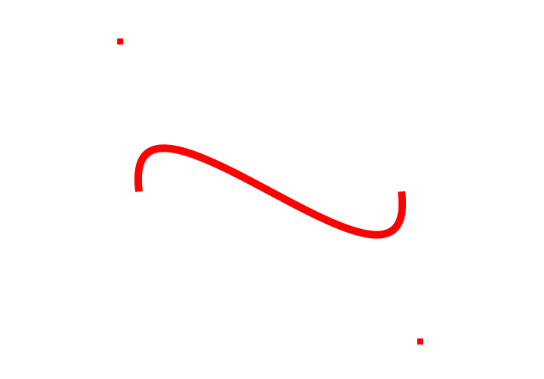
1
2
3
4
5
6
7
8
9
10
11
12
13
14
UIBezierPath *aPath = [[UIBezierPath alloc] init];
[aPath moveToPoint:CGPointMake(100, 200)];
[aPath addQuadCurveToPoint:CGPointMake(WIDTH-100, 200) controlPoint:CGPointMake(WIDTH/2-100, 100)];
aPath.lineWidth = 5.0;
UIBezierPath *pointA = [UIBezierPath bezierPathWithRect:CGRectMake(WIDTH/2-102, 98, 4, 4)];
pointA.lineWidth = 2;
UIColor *color = [UIColor redColor];
[color set];
[aPath stroke];
[pointA fill];
logo

多点控制(双点)

logo

多点控制和单点控制一样,移动到起点位置之后,使用系统提供的方法,添加两个控制点就可以了。

1
2
3
4
5
6
7
8
9
10
11
12
13
14
15
16
17
18
19
UIBezierPath *aPath = [[UIBezierPath alloc] init];
[aPath moveToPoint: CGPointMake(100, 200)];
[aPath addCurveToPoint:CGPointMake(WIDTH-100, 200) controlPoint1:CGPointMake(WIDTH/2-100, 100) controlPoint2:CGPointMake(WIDTH/2+100, 300)];
aPath.lineWidth = 5.0;
UIBezierPath *pointA = [UIBezierPath bezierPathWithRect:CGRectMake(WIDTH/2-102, 98, 4, 4)];
pointA.lineWidth = 2;
UIBezierPath *pointB = [UIBezierPath bezierPathWithRect:CGRectMake(WIDTH/2+98, 298, 4, 4)];
pointB.lineWidth = 2;
UIColor *color = [UIColor redColor];
[color set];
[aPath stroke];
[pointA fill];
[pointB fill];
logo

以上就是UIBezierPath的简单使用,仅作为个人学习笔记,如果有什么地方写的不对还请大神们批评指教。